Showing posts with label deadzone. Show all posts

Thursday, April 9, 2015

Deadzone Terrain 95% done

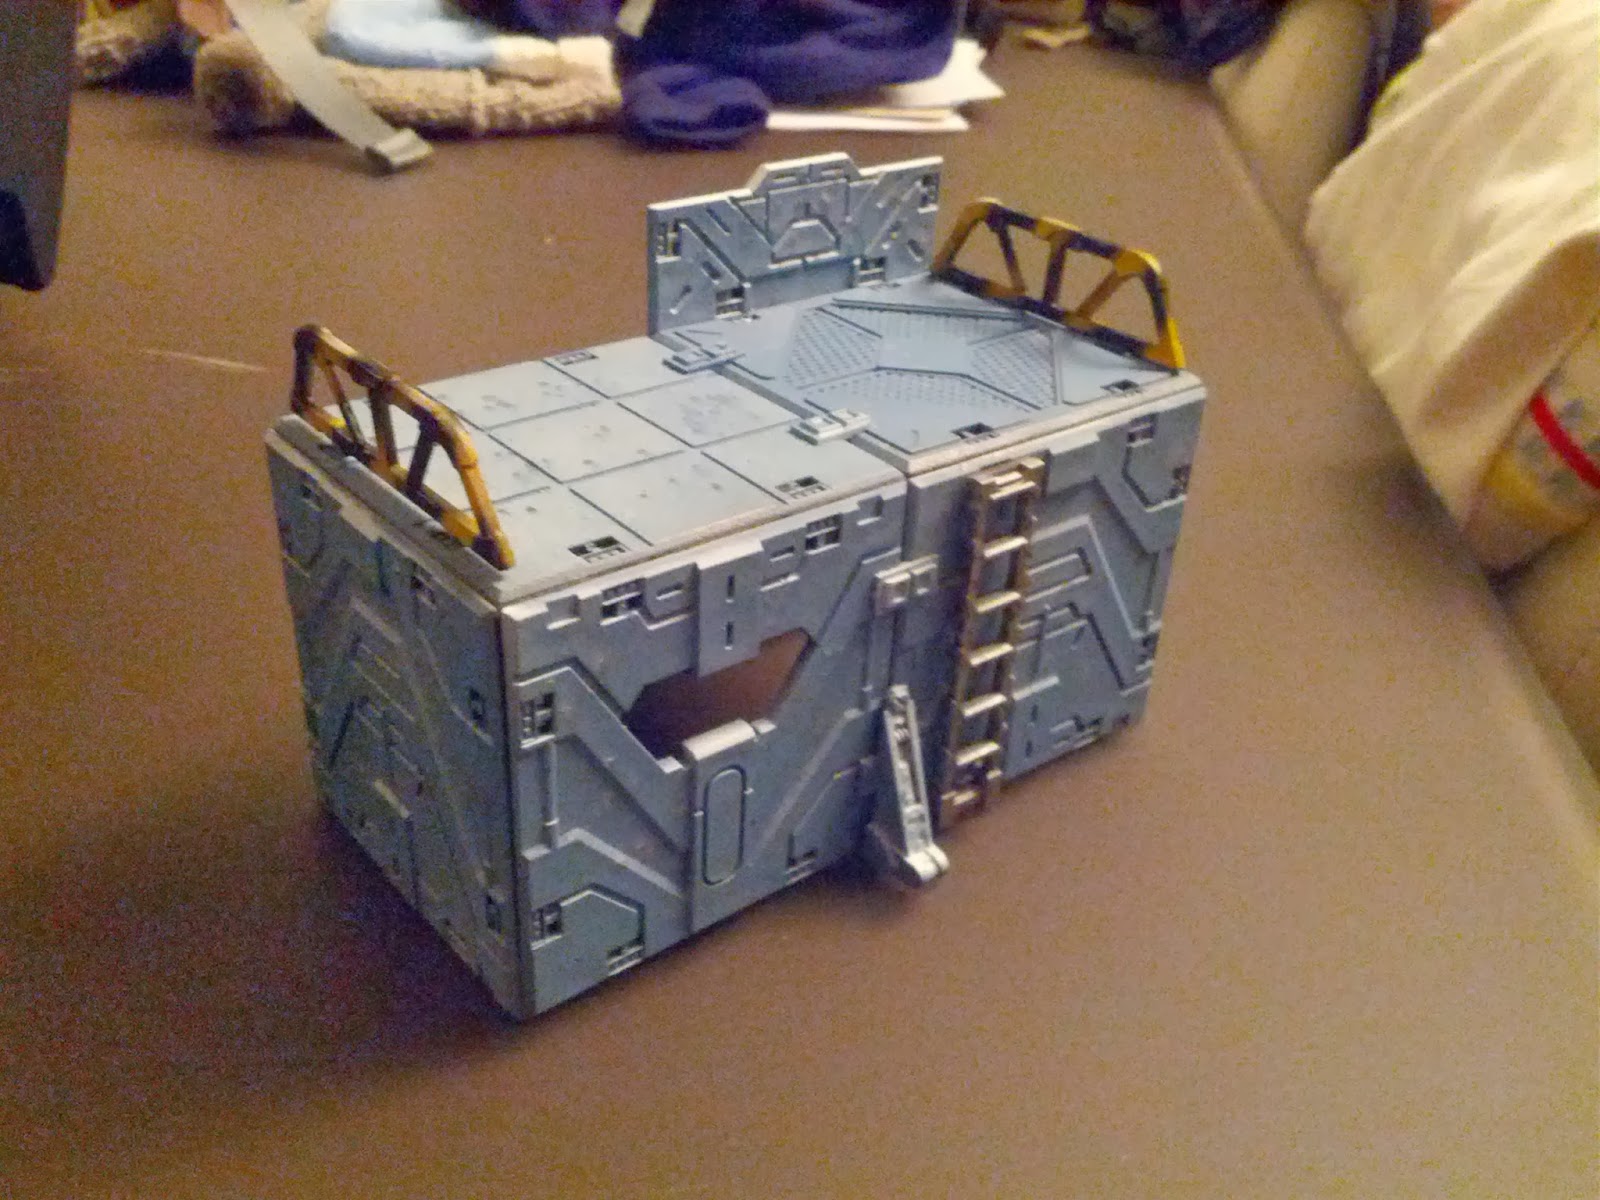
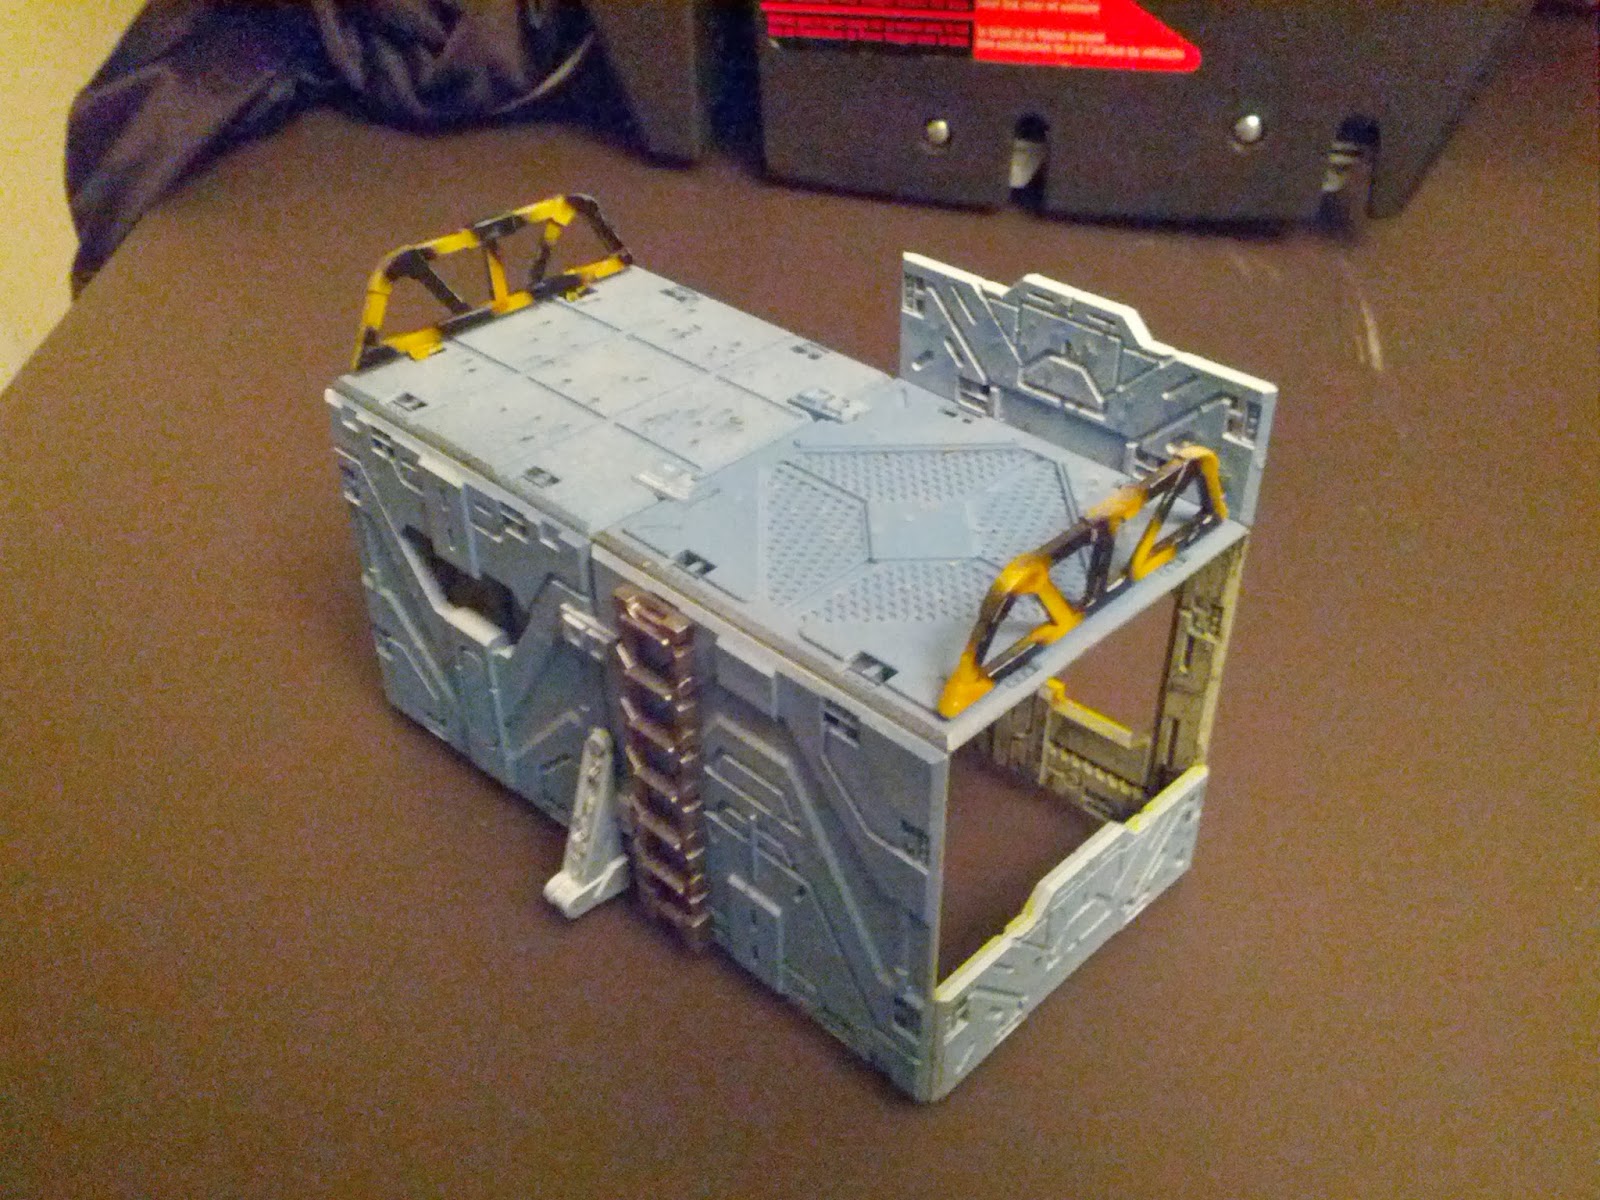
With a spate of warmer/dryer weather I managed to get my ruins tiles done.  Past few nights have been some assembly sessions and now this is the result.  It's a good volume of terrain for the mat and I'm quite please with how it has turned out.  You can see the flyers/posters I have glued on both inside and outside in places. I used the photos with flash as it lets you see more detail.
top down view
There is still some work to be done;

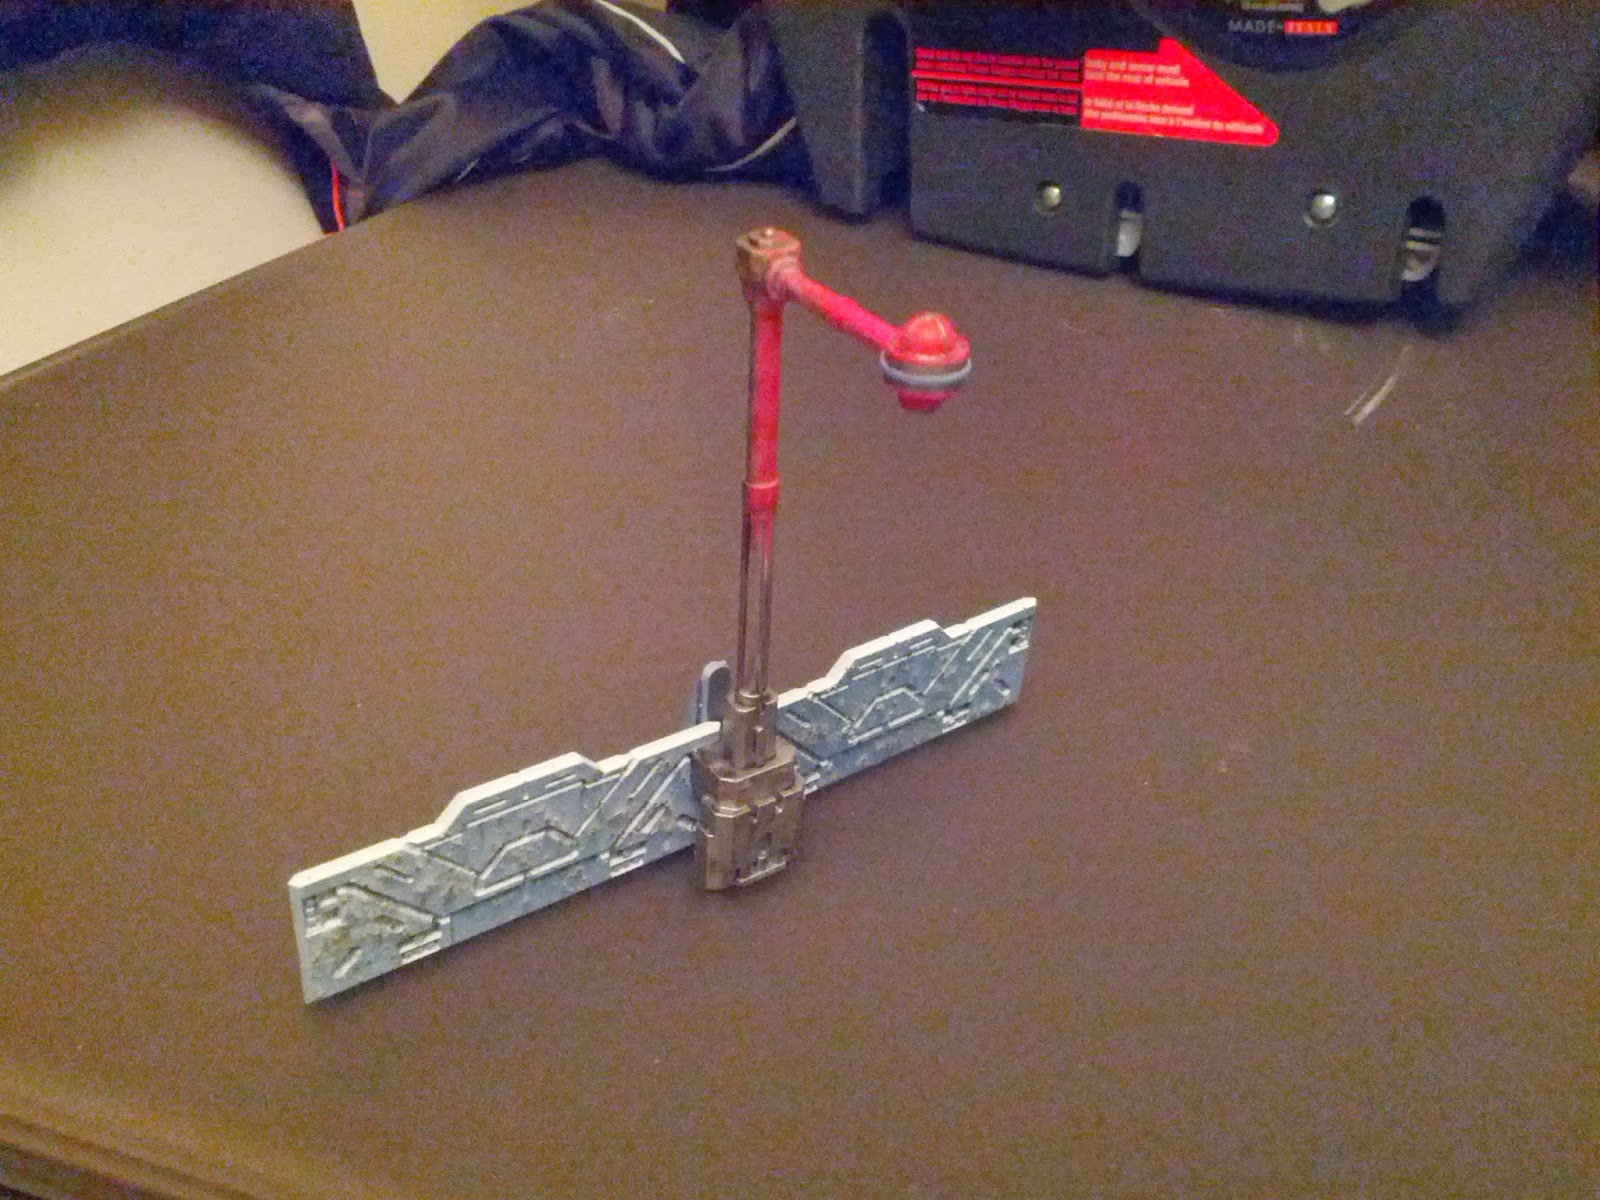
  • few more lamps and ladders need spraying platemail, washed and glued on - if you look closely you can see some lamps are painted "off" and another is "on".
  • couple more ramps and walkways need salt mask, space wolf grey - we had the temperature drop for a couple days and then mostly rain so that has been delayed - not much effort required.
  • touch ups on railings - the hazard stripes need cleaning up.
  • weather all the pieces with powders - this is the big one, I plan to wait for nicer weather as I don't want all my work getting rubbed off before the final stage
  • seal everything!

more of a side view
Getting these finished has really sparked my mind in terms of other terrain - though I will be getting brush to fig first a bit.

All in it's about 108 painting points and I have some more clutter accessories and such I can do at a later time.

Tuesday, March 24, 2015

Random Game photos from Canadian Open weekend

As is usual the weekend of the Canadian Open, a lot of buddies crash at my place and Friday/Saturday night are given over to playing other board and card games.  In addition to the below we also played some Dominion and lots of the Resistance.
Castles of Mad King Ludwig
Was happy to get a run out for my Space Hulk set.  Playing with fully painted figs really makes it a gorgeous game. We had a player each for the terminator squads and two guys play genestealers.
Space Hulk board
fancy edited photo
less fancy but still edited photo

Finally got a game of deadzone in against Dan who pledged into the kickstarter but hasn't had a game yet. He played enforcers with some proxy marines of mine and I played with my painted marauders.

He caught onto the rules pretty quick (those short/long action flowcharts really help) and due to some epic poor rolling from my goblin sniper (3 successes on 9 dice! TWICE) and a mistake I made with my mawbeast (not enraged before attacking) I lost the chance to really hurt his team, and once he figured out the differences between shoot and blaze he was much more effective in his decisions - he smoked me 11VP or something to 0.
bit fuzzy
much clearer
Hope you enjoy the photos.  This is one of my favourite parts about the tournament as I get to play a bunch of games as well :)

Monday, March 16, 2015

Deadzone Marauders - 4 more figures complete

Most of the base coating for these figures was done last year, but finally towards February of this year I began having an itch to paint again so I got them finished up. This represents 5 painting points (2 for the captain, 1 for each of the others) the captain has some significant highlights compared to the commandos, and the sniper has some extra detailing to make his cloak look like it was selected to match my deadzone terrain (unlike their generic strike team camouflage)
Commando Captain
I had to add a piece of terrain snipped off a door underneath his right foot to keep him balanced on the clear base.  The dullcote didn't seem to do as good a job on these guys I may try to protect the clear base and give them another spritz.

Commando with 2 guns
Love this guys head with the skull plate, the two guns do nothing in game terms he just looks bad ass. He's got long sleeves so not much skin, but I stuck with doing highlights using yellow directly on the goblin green skin and it works great IMO.

Commando
Gave this guy a simple head swap so he doesn't quite match the last one done using this body.

Goblin Sniper
Do like these guys, they are potentially powerful in the game but very unreliable due to their poor shooting skill.  Was pretty happy with how the cloak came out so it looks like he equipped himself for my terrain.

Between the last four and these four I have enough for a legit strike team while adding a few things like extra ammo, etc.  I will probably continue to try and paint up more of these guys in batches of four until they are all finished rather than switching gears to other factions.  I have another commando, another mawbeast, some more snipers and the pyro still to go.  Was planning to try and pick up an old AoBR ork warboss from the old GW 40K box since I like it better than the marauder warlord figure.

Saturday, April 26, 2014

new necromunda photos + deadzone rebs proxies

I've been updating my GWpertinent forces pages with new pics. I am still working on a large album for my Novamarines as I want them well documented before I sell or trade them off. Other than that I have mostly focused on necromunda stuff since they have low model count and usually I don't have many gang pictures.

I've also recently been trying to figure out what I can use to proxy a Rebs faction in deadzone until I get the actual figures assembled.

Here's the limited edition Bonnie Annerson bounty hunter...  a few shots so you can see the mask. Not sure what made me paint the mask that way, and I definitely wish I hadn't done so many funky colours on her pistol, but I do still love the base with it's sewing pin mushrooms and green ooze. She could easily stand in for the Rebs leader.

I recently updated my Spyrers page with a slew of new pics. I can easily use the Yelds as Kraaw warriors and was thinking the Orrus would be suitable as Grogans - would probably need to pick one weapon type per game to not be confusing.


I've also updated my Escher gang page with some photos. Gangers with basic rifle weapons can easily be human rebs. I can't imagine using that many humans that these six gangers wouldn't be enough.

Finally I've got some spore mines I painted up a while ago to use along with some expanded Wyrd rules by Anthony Case as Lashoaters - I could see these counting as drones pretty easily.

Unfortunately for me, I haven't collected a lot of alien type figures so my rebs gang would be pretty bland - currently I'd look at a LOTR troll as a Teraton but not sure I can bring myself to do that! Anyways would be enough to have a game and get a feel for their battle cards deck and some missions at least.

Tuesday, April 22, 2014

deadzone "rainmaker" ripper suit

Finally got back into the groove on this guy. Missing the shoulder gun during assembly really annoyed me about the whole thing. There is lots of fiddly details but I kept it pretty tabletop so left a lot of that detail to "come out in the wash" (hahaha).
view from right
I used the nihilakh oxide technical paint to give the tin weapons a verdigris look,which I particularly like on these hulking monstrosities. I combined that with the same coal black + drybrush silver for his weapons. I stole the red/yellow/green power bar for his laser weapon from someone I saw online.
view from left
I also decided to spread around the resin scenery that comes with the plague stage 2As. Why are they the only one's to get some? It definitely will tie in with my scenery.

Friday, March 21, 2014

more deadzone terrain acccessories

Just a quick one today - finished the painting part on the last set of deadzone terrain accessories. Technically they still need weathering powders but those take so long I'm going to save up a bunch of terrain to do all at once.
Started by priming with cheap krylon spray "ruddy brown", then an extremely light drybrush with P3 pig iron, followed by a thinned devlan mud wash. Then I applied the decals which I think I took from an old epic titans decal sheet. Finally I used a bit of foam to sponge apply some damage with vallejo tin.

Wednesday, March 5, 2014

deadzone miniatures review - part 2

Quick part two review of the deadzone figures. Assembling the second batch of marauders I've come upon a few more issues. The first is this guy - the captain. I'm not sure exactly what's the matter, but if the ammo box he's standing on is flat, then his right foot is way up in the air. I think I read about some other folks having this problem but I can't find it and thus can't note their solution. His whole body is one piece so warming it up and bending it probably won't do much. I will state that the body was very good for mold lines, but I am probably gonna have to use a little piece of something under his right foot.

Second issue was I think a casting one. I had done some minor converting to this guy to swap heads with the other duplicated commando figure to add a bit of variety. Then as I was clipping off his base, his entire right leg just popped off. There must have been some bubble or casting inconsistency as I didn't do anything different to the other figures I removed the base from.  In the third pic down you can see how clean the snap is and how there appears some colour striations which makes me think it wasn't as solid as usual.

Thankfully I found the leg so hopefully a bit of epoxy and liquid green stuff will fix this guy up.

If I place the two pieces together they don't match perfectly - further supporting my thoughts.

So once again these are not the best miniatures in the world, but for the price which was not Reaper Bones cheap but pretty close I'd say they are still a good step above. Still frustrating to deal with but at least they come out with decent detail.

Friday, February 28, 2014

deadzone mawbeast

Sorry for the crappy pics - I just can't be arsed to spend any time getting nicer photos when I know how easy it will be once my FOLDIO shows up. I've finished up the first mawbeast, taking the advice of my man Axtlinge from Merry Mayhem News & NABBO league fame - and mimicking a "paroedura bastardi" gecko pattern on his fur using the same camouflage colours as the other marauders. I tried building a little "stamping tool" using some pluck foam bits. Unfortunately it was just too big to use on the mawbeasts fur as you can see below.
What I ended up doing instead is making a couple much smaller individual stamps and just doing the pattern manually. I used a dark grey instead of black but the red I kept the same. I used the same coal black I painted the commandos rifles for his nose and used iyanden darksun for his mane & tail. Any metallics are the same as well. A couple watered down coats of devlan mud followed and I am pretty happy with the result.
Did a quick "gem" job on his cybernetic eye and the usual clear acrylic base. When trying to glue him on the first time I accidentally spread the two part epoxy all over and was quite annoyed as I thought I'd ruined the base. However I found out that if you are quick enough and it hasn't set - it is quite easy to wipe the base completely clean with nothing but a paper towel. So a second try later and I had him glued to the same base. Score!
Next up is the first ripper suit. I have been delayed painting this guy because without any assembly instructions I ended up missing a gun piece that is supposed to mount on his backpack. In doing so I put a little accessory right in the way so I've had to do some cutting and chopping to get it to fit and that part isn't primed. Still I intend to get started on him - what are peoples thoughts for his scheme? Should I follow the same simple camo scheme on the marauders or maybe use the bigger stamping tool I couldn't use on the mawbeast? This is what the suit looks like - he is plenty big and will be the first to go on a 40mm clear acrylic base.

Friday, February 21, 2014

deadzone accessories painted

Another quick little snap of some deadzone progress. There is one more batch of little accessories to do, but I don't have a suitable different colour spray to use. I had definitely planned to use the yellow spray on the containers with the hazard symbol, and I picked up some cheap krylon sprays recently and the olive green works well for the boxier crates.
To mix it up a bit I used two different colours on the hazard symbol and applied some decals to the green crates - then I used a bit of sponge to apply some damage/weathering in a metallic colour. The last set of accessories are gas can looking and I hope to find some red or brownish colour to spray them.

* oops that just reminded me I need to add some weathering powders onto these pieces - will probably keep it simple with one colour each, not sure about any washes.

Monday, February 17, 2014

second marauder commando

Just a quick one today to show off the second marauder I've finished. That's half of the first four figures I've put together. I hope this camo scheme works well on the ripper suit. Tried to keep the palette very limited.
I would also love some suggestions for paint scheme for the mawbeast I've assembled in this post. I decided instead of using some green stuff to cover up the miscast bomb, I cut the bomb part off anyways since they haven't made a bomb-less mawbeast yet.

Friday, February 14, 2014

first deadzone figure finished - marauder commando

This guy is from the "Marauder Extra 1" bag and is the only piece it contains. I think somehow I ended up with an extra of these guys, though it's hard to tell. I have another commando pose with most of the basecoats done and that should be my next completed deadzone fig. I chose a very "GW 40K Blood Axe Ork" scheme using grey's and a bit of camo. The battle gear these guys have along with all the packs and pouches reminded me very much of the blood axes.
base? what base?
Tested out a couple "tricks" on this figure. One is the manner in which I highlighted his flesh. Everyone knows yellow is a hard colour to get good coverage with, so for a test I tried highlighting his flesh with yellow straight from the pot (it was a P3 yellow, but quite bright) meaning a thin coat did a great job of lightening the goblin green colour and it was much quicker than having to mix a highlight tone. It may be hard to tell from these photos but I was very happy with the result. If anyone cares I can try to take some in progress pics.
on table
on scenery
Trick number two was attempting to use a dip/stain to handle shading.  I mixed up a tiny bit of wood stain with a bunch of water in a paint pot and tried applying it with a piece of foam. It ended up being way to dark and I'm not sure why.  I used the same stain as on my Pit Slaves and just dabbed it on. Perhaps the base colours just don't work as well or maybe I just did not use enough water in the mix. I will have to check out the army painter dips at some point but I managed to clean most of it off with water and a toothbrush. There are bits left which actually just look like dirt & grime so I will probably use a touch of it on every fig in opportune places.
on table
on scenery
The final trick is obviously the clear acrylic base from litko bases (picked up on boxing day sale from the FLGS meeplemart's online shop) It's an interesting concept to avoid the need to paint any bases and pretty much just match whatever scenery you are playing on. At first I was very "gung-ho" to put all the deadzone figures on these bases - but I think I may backtrack from that a bit. While cool when on the scenery it does detract a bit from the figure when just on the table. The plague faction will definitely get them since they have scenery bits as part of the figures and I intend to paint them the same as my terrain. Having second thoughts for the enforcer and rebs factions though. Might use them for a necromunda gang in the future and definitely will be using them for a blood bowl team. Hope everyone likes the "edited & effects" photo at the top of the post - I used some control points in google+ image editor to fade out the base as much as possible, then used some visual effects similar to the space hulk photos I posted earlier this year. It's a bit obvious from the fading but I thought it was fun.

Saturday, February 8, 2014

first deadzone terrain piece finished

Well the first piece is finished. Over the last week I've applied a bunch of weathering powders, some decals and glued on some little "posters" I've printed out. I've tried some different methods of using the powders mixed with washes which worked fairly well. I also have been using 3 different tones of the rust series. I do have to say that it is quite time consuming and I should maybe save these (or even sell them off) for very particular effects and that after seeing the results Anton achieved using modelmates rust spray, it definitely seems a better way to go for large pieces like this.  Perhaps a combination though I am not unhappy with the powder results.
a decal by the door plus powders & washes
The print outs didn't actually print that well - I cheated and just used some old photo paper in the inkjet at work, and some of them faded or misprinted. To be honest, many of them are still usable since they will match the aged/weathered look of the tiles.
fuel storage sign, covered with washes and powders
I am debating whether I should actually glue some fuel tanks to the side of the building or not, I am still leaning towards not, since they will be more useful loose to be placed wherever you need (they could go on the roof too.
warning sign posted and powders & powders/washes
Using the grid on the top I felt it looked really smart to have the rusty wash pool along the grid lines. I tried to use a marauder boot with some paint to leave boot prints but it didn't work very well. Instead I just ended up cleaning (not really the right word) up the boot print with some freehand. It looks OK, but not as nice as I'd hoped.
small decal - sorry for blurry photo
I am really happy with the deadzone terrain - I've mentioned to some friends it's right in between the necromunda bulkheads (which require some card) and the platformer/hexagon stuff (which are more complex to assemble, but can provide much more complex buildings). Looking forward to getting more put together - I hope to get some games in soon.

Friday, January 31, 2014

deadzone terrain accesories

Let's have a look at some of the accessories that come with the deadzone terrain.  First up a couple snaps of my first piece of terrain with some additional details. I added a ladder to the rear and a couple railings to the sides. The railings were sprayed with the same yellow as the detailing on the tiles, and I built a cheap stencil with popsicle sticks to do a quick and dirty job of hazard stripes. They look quite decent IMO and I just used a medium grey to do a quick line highlight. If the highlight got too think I just wiped most of it off.
rear photo from the right
You can also see the ladder which I was originally debating doing in some brighter colour to make it stand out in game - but in the end I decided that for something like that why would anyone put that effort into it, so solid metal it is. I gave it a quick wash with badab black to pick out the rivets. I also did quite a bit of filing/scraping to get the mold lines off, I felt they would really detract from the look.
rear photo from the left
Finally here's a quick barrier I made up from two pieces and a street lamp. I decided that more yellow would not really do justice to the street lamp so I tried my hand at some red OSL. It came out OK, but I think I learned that next time, I am going to drybrush white before each successively brighter layer, because the red alone doesn't make enough difference. We'll see how that goes and compare the two later.
quick barrier with street lamp
Also it isn't quite well balanced - the street lamp connector doesn't quite touch the floor, and the lamp itself makes that side heavier so it leans over. I am not sure what I will do about it, I may use a piece that looks like a girder to prop it up or not, still debating.

Next up for these two pieces will be weathering powders and powders + washes.

Tuesday, January 28, 2014

first piece of deadzone terrain assembled

Found a bit of time late last night to try my hand at assembling some of the tiles I have painted. The first obvious thing to state is you just do not get enough connectors.  I thought people were saying this simply because they got the incorrect number of sprues. I tried to not use a connector in every socket possible to save some and am pretty sure I got away with it for the most part. The terrain is so sturdy I have no worries about even a heavy metal model causing structural integrity issues.
front side, had always planned for windows and barrier with stripe to go together
I still want to add some details to this piece.  I sprayed the ladder & streetlamp pieces metal last night and have been working on some of the crates and railings using a yellow spray as well. This piece will get a ladder going up the back and probably a set of railings or two. I am torn between gluing some crates down or just leaving them loose and putting them wherever they are needed at the time.
using a barrier as a wall will give a new dimension to movement in deadzone
It may seem a bit boring, but this structure manages to do a bunch of stuff I wanted to test out with my first deadzone building - namely 1) a barrier on top for protection 2) using a barrier as a wall 3) lots of doorways/windows/space so you can see the fluorescent lighting tile to a degree (see below). I am also pretty impressed with the strength of the connectors, none have snapped yet and I have used a set of pliers to get them to be as secure as possible.
look at the far roof tile to see the fluorescent lights
Really like the above picture, the grime on the inside walls is quite apparent and it should make for good battle report photos from a miniatures eye view. Once I get the railings and ladders glued on I am looking forward to using some rusty weathering powders to add a final touch of realism and also tie the tiles together since painting them separately is a tiny bit obvious once assembled.
???
PS. Does anyone know exactly what Mantic's thoughts for these pieces were?  They are clearly doors for the open tile next to the windows tile in my building, but there isn't really an easy way to connect them.  The little hook at the top works but I am not sure if they meant them to be glued together or act as temporary doors? Would love some thoughts?

Finally this was my brainchild but I am planning to do a lot of looking around for inspiration before I build the next building.  I also really want to spread around the yellow detailed tiles so I may start spraying up the second batch without any yellow so it's easier to make them appear more special.
Related Posts Plugin for WordPress, Blogger...