Showing posts with label terrain. Show all posts
Sunday, December 20, 2015
Stackable Necromunda Terrain ('munda table in a box)
Earlier this year I completed the paint & build of my mantic deadzone scenery - and in doing so a number of thoughts came to mind. First was an interest in home built scenery again, and I started using pinterest to research and find different ideas. Second was "here's another huge box I will need to store this scenery while it's not being used". I already have four big boxes marked "necromunda" and this would be another one.
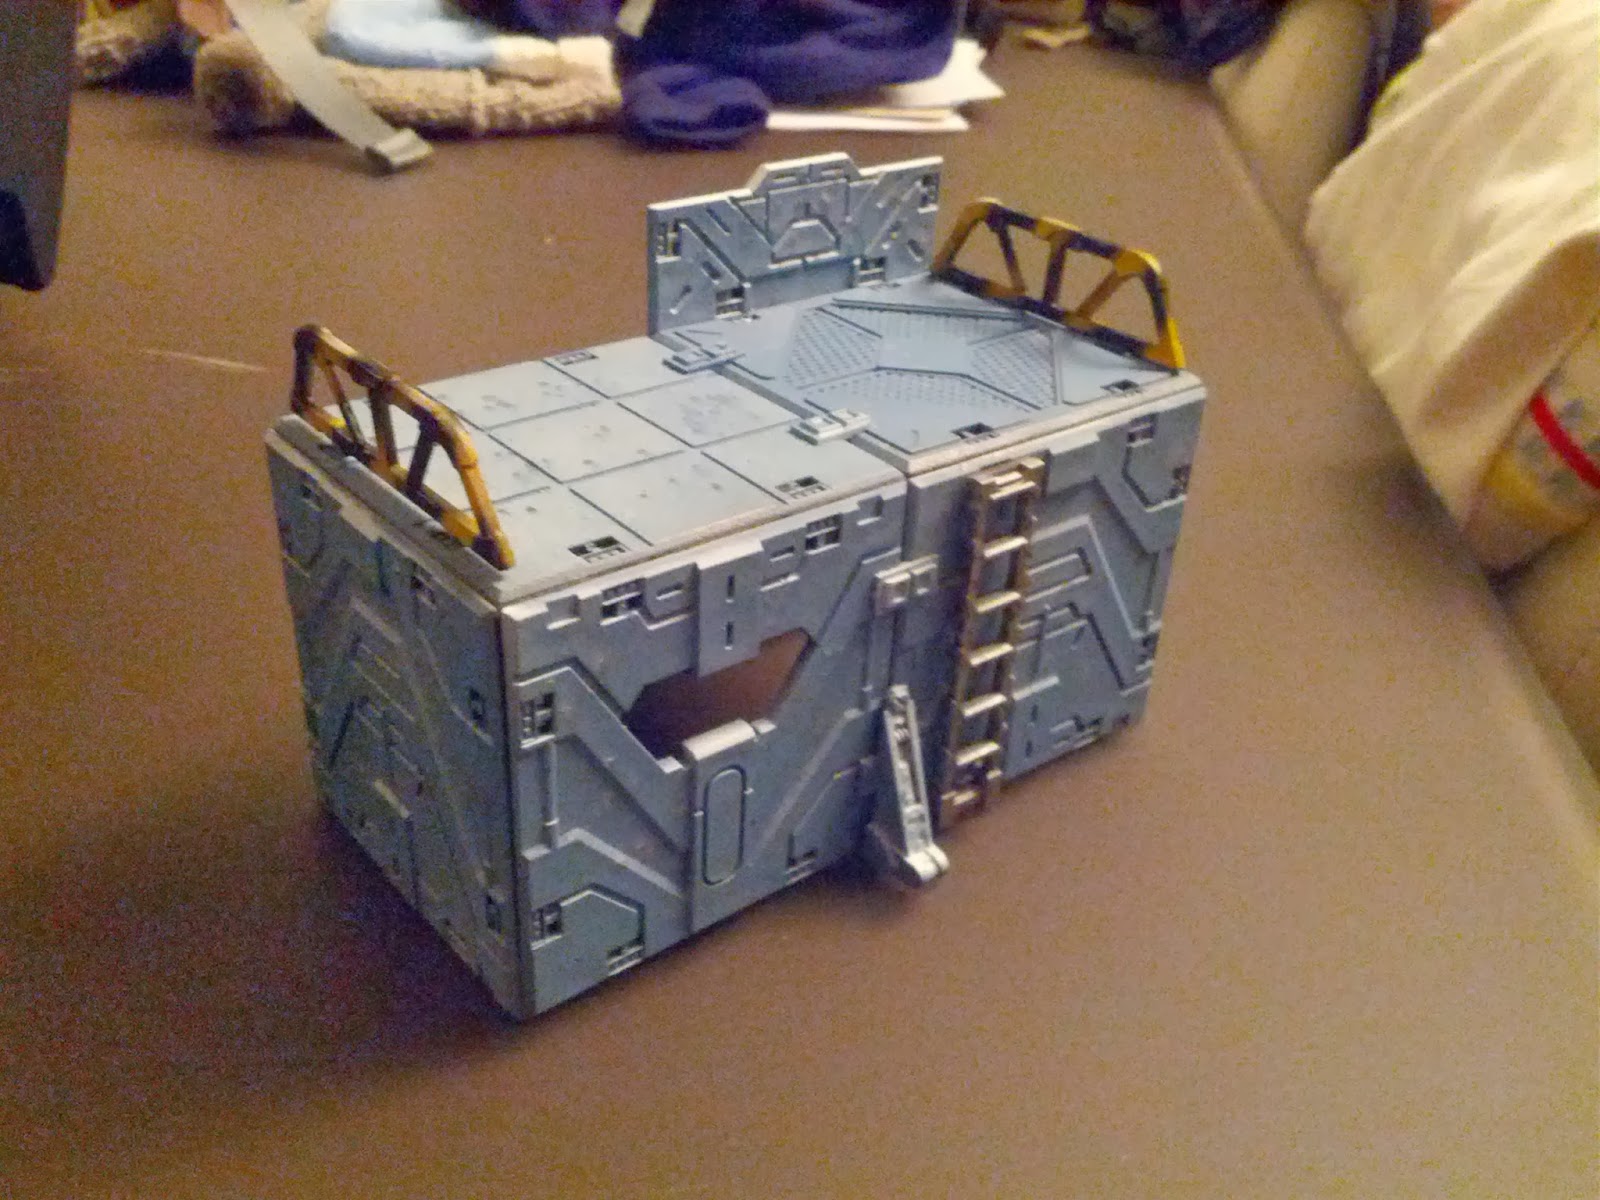
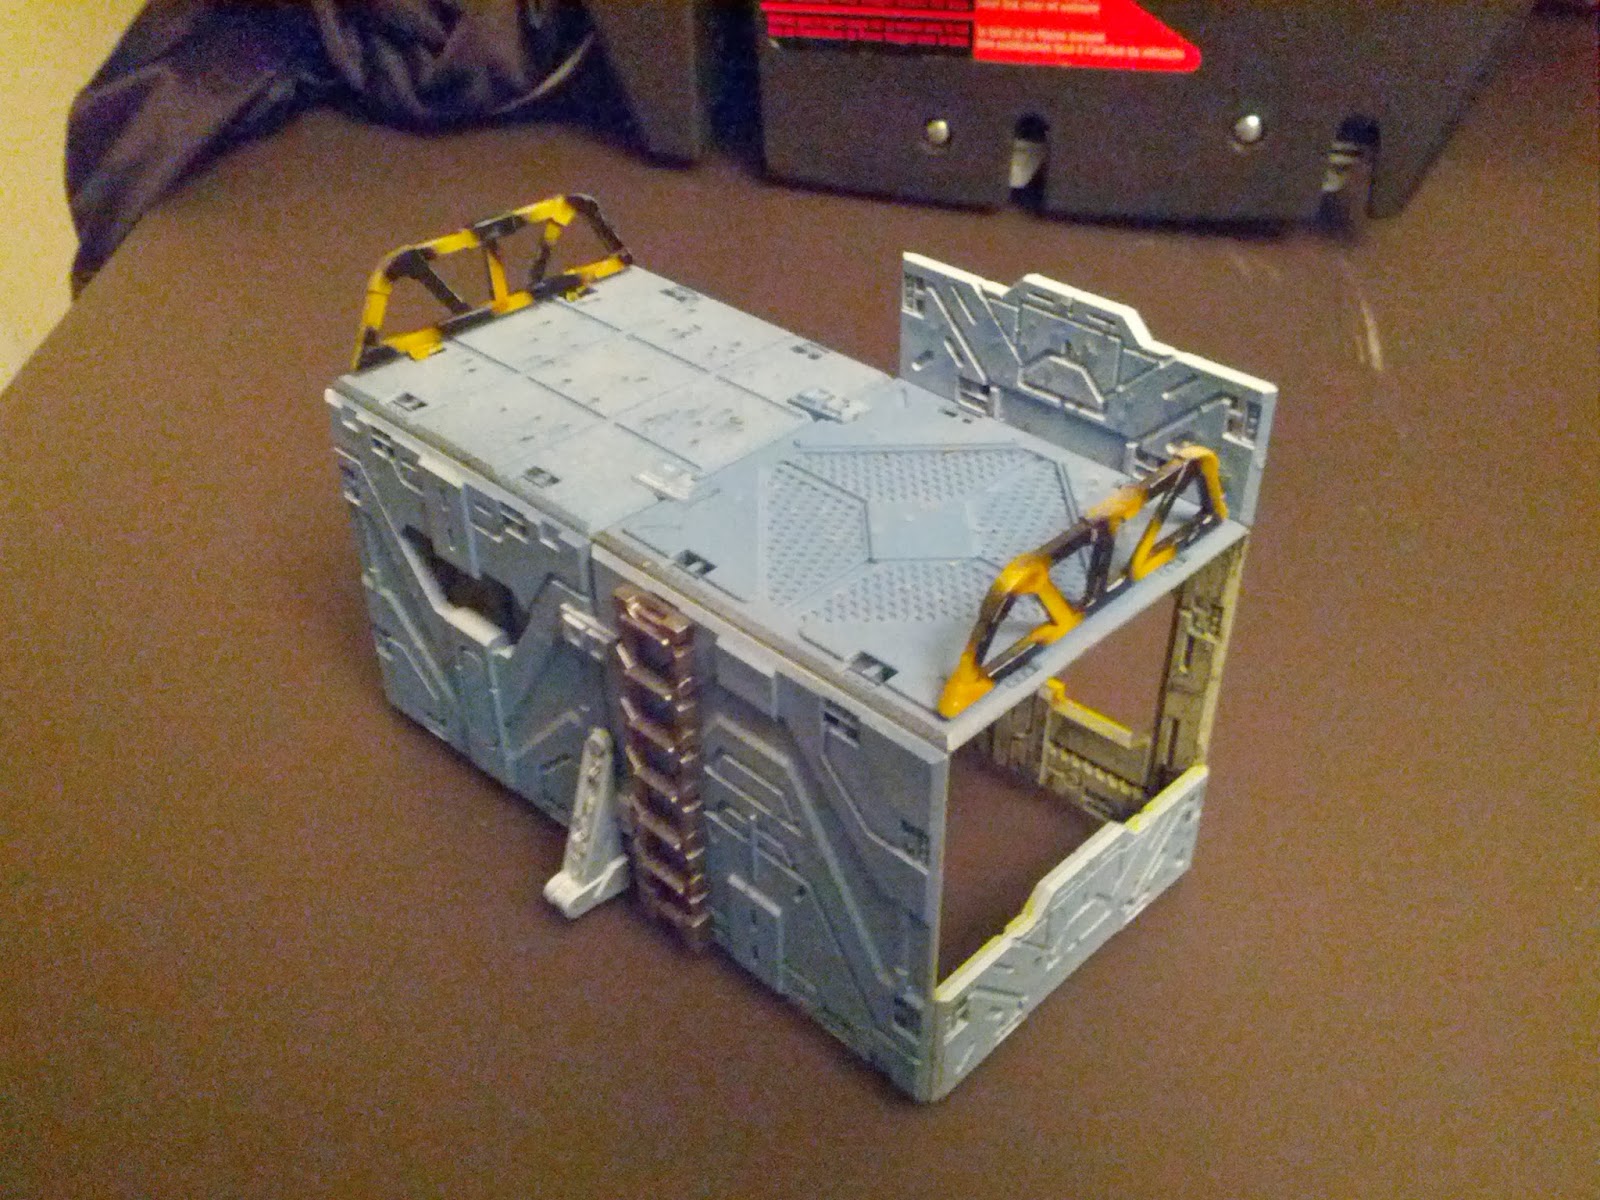
During my pinterest hunting, I spotted this from Descent of Angels - and I immediately had to run out to pick up some materials to give it a whirl. I ended up building a bunch of buildings, a bunch of walkways, some pipeline, and some scatter terrain. I also did up two boxes as stackable "tiers" for some extra elevation. Two are done the same colour as the buildings and the other two are darker without any doorways or ladders, meant to just give the table some additional height.
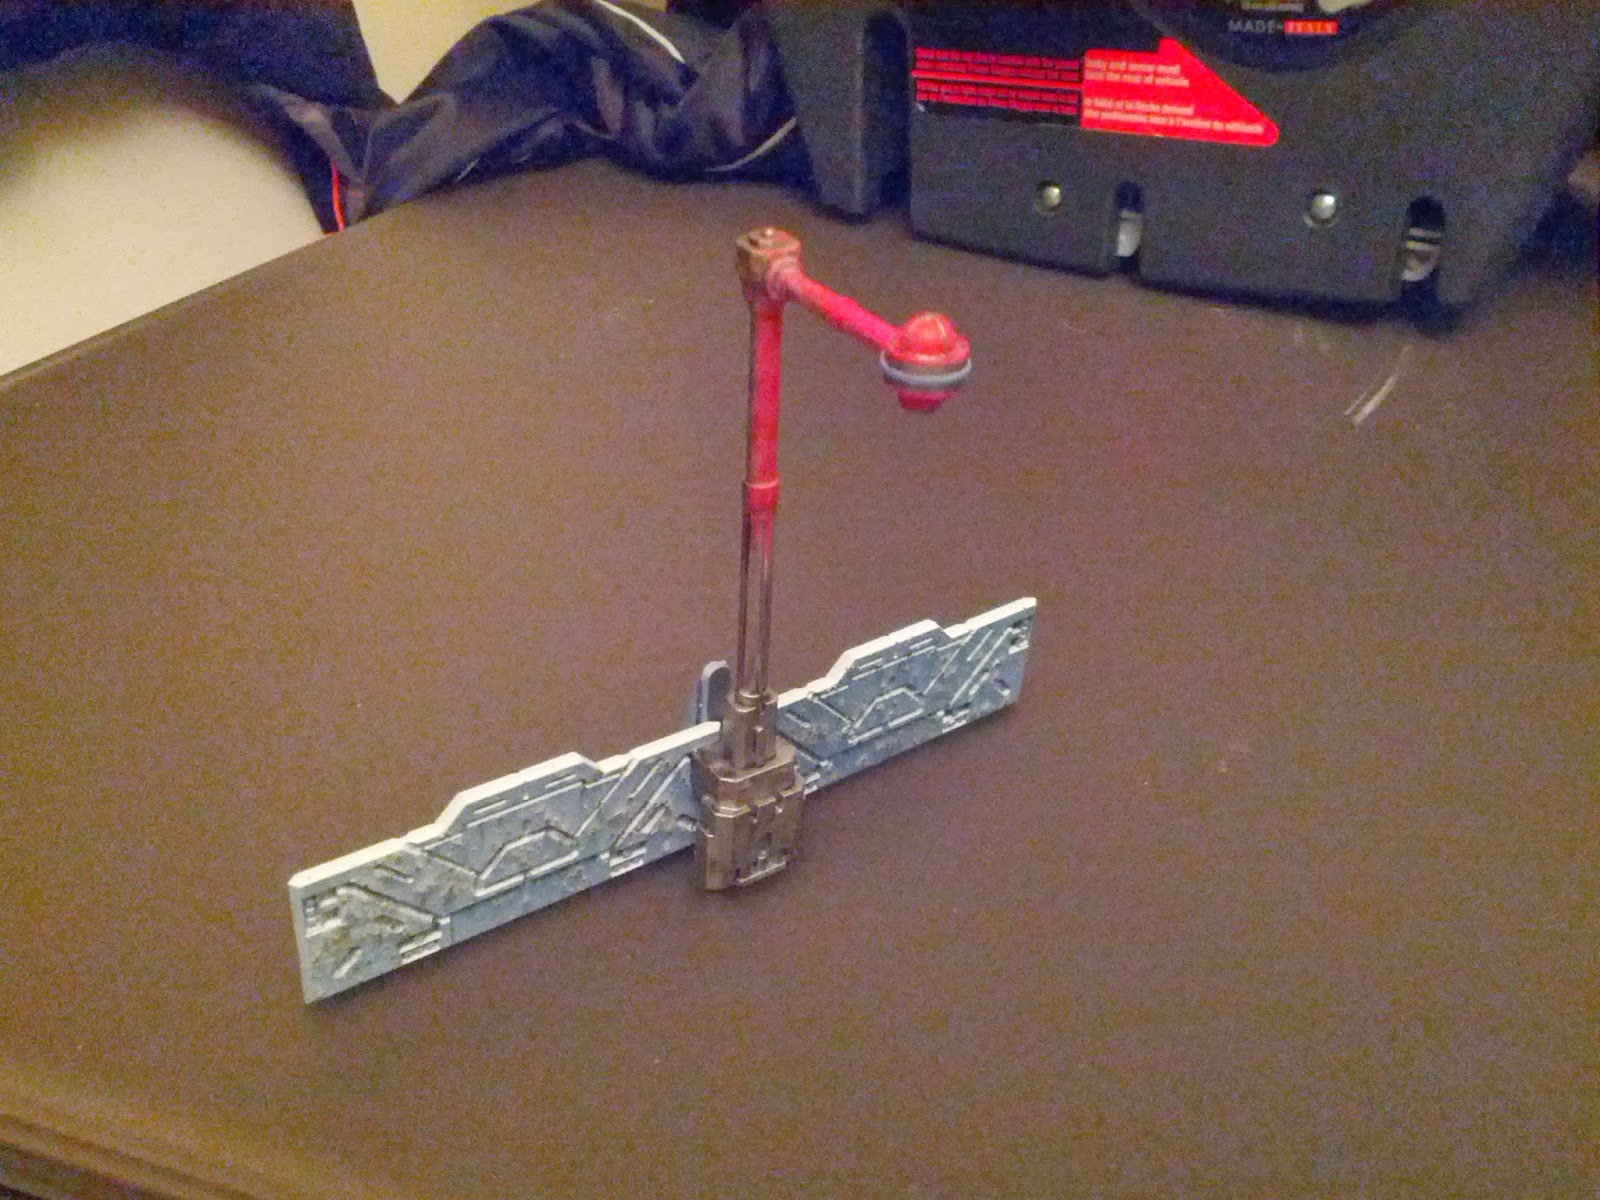
I used some hexagoner plastic pieces to add ladders, doors and hatches to the nesting boxes, sprayed them a rusty colour and drybrushed them silver. I also used popsicle sticks to add some detail to the nesting boxes and then sprayed them grey and used the textured spray paint I used on the brewhouse bash board. For the pipelines I just used the tubes from tinfoil, for the walkways I used plastic canvas to put some "grate" texture, for the scatter terrain I just sprayed a bunch of spare hexagoner bits and glued them onto CD's that had the texture spray.
As I built up a bundle of ideas (like the pipeline, scatter terrain, bridges/walkways, etc.) I decided I had other ideas I wanted to implement for my own "pack and play" so I ended up making this a "housewarming" gift for my buddy Mike from shiftedmatrix.com - he's spent a year renovating the old house they bought and it's very near our house. You may recall he's the one I played serious necromunda sessions with in the past so hopeful this will mean starting that up again :)
Here's the total painting points awarded for this effort. The entire thing packs up into a single medium sized plastic box for easy storage.
necromunda in a box (160)
2 small buildings (10)
3 medium buildings (30)
4 large building (80)
1 wide walkways (2)
6 long walkways (12)
4 scatter debris (8)
2 building extensions (6)
2 long pipelines (8)
2 short pipelines (4)
Tuesday, June 9, 2015
Terrain Quick Hit - Basing the Imperial Firebase
I have had this cardboard and bulkhead Firebase built for years - frequently used in Necromunda as well as 40K battles, I decided it was time to give it a base, since I don't want it to become as beat up as my power station did.
After the success of the texture spray paint for the brewhouse bash board - that is what I went with for this base. At first I tried adding some volume to the base using hot glue in various places - don't do this! It didn't stick well to the MDF - it worked well enough to stick the Firebase down but any loose hot glue peeled off very easily.
Anyways - a quick hit I gave myself 5 points for this. I spent some time with a pen to colour up the cardboard and use super glue with a brush applicator to stiffen it and protect it.
After the success of the texture spray paint for the brewhouse bash board - that is what I went with for this base. At first I tried adding some volume to the base using hot glue in various places - don't do this! It didn't stick well to the MDF - it worked well enough to stick the Firebase down but any loose hot glue peeled off very easily.
Anyways - a quick hit I gave myself 5 points for this. I spent some time with a pen to colour up the cardboard and use super glue with a brush applicator to stiffen it and protect it.
Thursday, April 9, 2015
Deadzone Terrain 95% done
With a spate of warmer/dryer weather I managed to get my ruins tiles done. Past few nights have been some assembly sessions and now this is the result. It's a good volume of terrain for the mat and I'm quite please with how it has turned out. You can see the flyers/posters I have glued on both inside and outside in places. I used the photos with flash as it lets you see more detail.
There is still some work to be done;
Getting these finished has really sparked my mind in terms of other terrain - though I will be getting brush to fig first a bit.
All in it's about 108 painting points and I have some more clutter accessories and such I can do at a later time.
![]() |
| top down view |
- few more lamps and ladders need spraying platemail, washed and glued on - if you look closely you can see some lamps are painted "off" and another is "on".
- couple more ramps and walkways need salt mask, space wolf grey - we had the temperature drop for a couple days and then mostly rain so that has been delayed - not much effort required.
- touch ups on railings - the hazard stripes need cleaning up.
- weather all the pieces with powders - this is the big one, I plan to wait for nicer weather as I don't want all my work getting rubbed off before the final stage
- seal everything!
![]() |
| more of a side view |
All in it's about 108 painting points and I have some more clutter accessories and such I can do at a later time.
Friday, March 21, 2014
more deadzone terrain acccessories
Just a quick one today - finished the painting part on the last set of deadzone terrain accessories. Technically they still need weathering powders but those take so long I'm going to save up a bunch of terrain to do all at once.
Started by priming with cheap krylon spray "ruddy brown", then an extremely light drybrush with P3 pig iron, followed by a thinned devlan mud wash. Then I applied the decals which I think I took from an old epic titans decal sheet. Finally I used a bit of foam to sponge apply some damage with vallejo tin.
Friday, February 21, 2014
deadzone accessories painted
Another quick little snap of some deadzone progress. There is one more batch of little accessories to do, but I don't have a suitable different colour spray to use. I had definitely planned to use the yellow spray on the containers with the hazard symbol, and I picked up some cheap krylon sprays recently and the olive green works well for the boxier crates.
To mix it up a bit I used two different colours on the hazard symbol and applied some decals to the green crates - then I used a bit of sponge to apply some damage/weathering in a metallic colour. The last set of accessories are gas can looking and I hope to find some red or brownish colour to spray them.
* oops that just reminded me I need to add some weathering powders onto these pieces - will probably keep it simple with one colour each, not sure about any washes.
To mix it up a bit I used two different colours on the hazard symbol and applied some decals to the green crates - then I used a bit of sponge to apply some damage/weathering in a metallic colour. The last set of accessories are gas can looking and I hope to find some red or brownish colour to spray them.
* oops that just reminded me I need to add some weathering powders onto these pieces - will probably keep it simple with one colour each, not sure about any washes.
Saturday, February 8, 2014
first deadzone terrain piece finished
Well the first piece is finished. Over the last week I've applied a bunch of weathering powders, some decals and glued on some little "posters" I've printed out. I've tried some different methods of using the powders mixed with washes which worked fairly well. I also have been using 3 different tones of the rust series. I do have to say that it is quite time consuming and I should maybe save these (or even sell them off) for very particular effects and that after seeing the results Anton achieved using modelmates rust spray, it definitely seems a better way to go for large pieces like this. Perhaps a combination though I am not unhappy with the powder results.
The print outs didn't actually print that well - I cheated and just used some old photo paper in the inkjet at work, and some of them faded or misprinted. To be honest, many of them are still usable since they will match the aged/weathered look of the tiles.
![]() |
| a decal by the door plus powders & washes |
![]() |
| fuel storage sign, covered with washes and powders |
I am debating whether I should actually glue some fuel tanks to the side of the building or not, I am still leaning towards not, since they will be more useful loose to be placed wherever you need (they could go on the roof too.
![]() |
| warning sign posted and powders & powders/washes |
Using the grid on the top I felt it looked really smart to have the rusty wash pool along the grid lines. I tried to use a marauder boot with some paint to leave boot prints but it didn't work very well. Instead I just ended up cleaning (not really the right word) up the boot print with some freehand. It looks OK, but not as nice as I'd hoped.
![]() |
| small decal - sorry for blurry photo |
I am really happy with the deadzone terrain - I've mentioned to some friends it's right in between the necromunda bulkheads (which require some card) and the platformer/hexagon stuff (which are more complex to assemble, but can provide much more complex buildings). Looking forward to getting more put together - I hope to get some games in soon.
Friday, January 31, 2014
deadzone terrain accesories
Let's have a look at some of the accessories that come with the deadzone terrain. First up a couple snaps of my first piece of terrain with some additional details. I added a ladder to the rear and a couple railings to the sides. The railings were sprayed with the same yellow as the detailing on the tiles, and I built a cheap stencil with popsicle sticks to do a quick and dirty job of hazard stripes. They look quite decent IMO and I just used a medium grey to do a quick line highlight. If the highlight got too think I just wiped most of it off.
You can also see the ladder which I was originally debating doing in some brighter colour to make it stand out in game - but in the end I decided that for something like that why would anyone put that effort into it, so solid metal it is. I gave it a quick wash with badab black to pick out the rivets. I also did quite a bit of filing/scraping to get the mold lines off, I felt they would really detract from the look.
Finally here's a quick barrier I made up from two pieces and a street lamp. I decided that more yellow would not really do justice to the street lamp so I tried my hand at some red OSL. It came out OK, but I think I learned that next time, I am going to drybrush white before each successively brighter layer, because the red alone doesn't make enough difference. We'll see how that goes and compare the two later.
Also it isn't quite well balanced - the street lamp connector doesn't quite touch the floor, and the lamp itself makes that side heavier so it leans over. I am not sure what I will do about it, I may use a piece that looks like a girder to prop it up or not, still debating.
Next up for these two pieces will be weathering powders and powders + washes.
![]() |
| rear photo from the right |
![]() |
| rear photo from the left |
![]() |
| quick barrier with street lamp |
Next up for these two pieces will be weathering powders and powders + washes.
Tuesday, January 28, 2014
first piece of deadzone terrain assembled
Found a bit of time late last night to try my hand at assembling some of the tiles I have painted. The first obvious thing to state is you just do not get enough connectors. I thought people were saying this simply because they got the incorrect number of sprues. I tried to not use a connector in every socket possible to save some and am pretty sure I got away with it for the most part. The terrain is so sturdy I have no worries about even a heavy metal model causing structural integrity issues.
I still want to add some details to this piece. I sprayed the ladder & streetlamp pieces metal last night and have been working on some of the crates and railings using a yellow spray as well. This piece will get a ladder going up the back and probably a set of railings or two. I am torn between gluing some crates down or just leaving them loose and putting them wherever they are needed at the time.
It may seem a bit boring, but this structure manages to do a bunch of stuff I wanted to test out with my first deadzone building - namely 1) a barrier on top for protection 2) using a barrier as a wall 3) lots of doorways/windows/space so you can see the fluorescent lighting tile to a degree (see below). I am also pretty impressed with the strength of the connectors, none have snapped yet and I have used a set of pliers to get them to be as secure as possible.
Really like the above picture, the grime on the inside walls is quite apparent and it should make for good battle report photos from a miniatures eye view. Once I get the railings and ladders glued on I am looking forward to using some rusty weathering powders to add a final touch of realism and also tie the tiles together since painting them separately is a tiny bit obvious once assembled.
PS. Does anyone know exactly what Mantic's thoughts for these pieces were? They are clearly doors for the open tile next to the windows tile in my building, but there isn't really an easy way to connect them. The little hook at the top works but I am not sure if they meant them to be glued together or act as temporary doors? Would love some thoughts?
Finally this was my brainchild but I am planning to do a lot of looking around for inspiration before I build the next building. I also really want to spread around the yellow detailed tiles so I may start spraying up the second batch without any yellow so it's easier to make them appear more special.
![]() |
| front side, had always planned for windows and barrier with stripe to go together |
![]() |
| using a barrier as a wall will give a new dimension to movement in deadzone |
![]() |
| look at the far roof tile to see the fluorescent lights |
![]() |
| ??? |
Finally this was my brainchild but I am planning to do a lot of looking around for inspiration before I build the next building. I also really want to spread around the yellow detailed tiles so I may start spraying up the second batch without any yellow so it's easier to make them appear more special.
Tuesday, January 21, 2014
deadzone terrain - part 1
Originally my plan concerning deadzone was to get some models painted first. I have tons of suitable necromunda terrain that I could use to play on, so getting this terrain painted seemed a bit overkill. However there have been a lot of really great blog posts up about the terrain (find a sample at the end of this post) and I ended up devising a plan to get it painted using mostly spray paints which means prep, spray & then WAIT. So while I am currently painting up a counts as Ripper for my Insane Goblin Posse to prep for a tournament in February, I thought why not get this going as well. Also my waffling on paint scheme for the plague faction has meant I have not even started assembling/prepping those figs (and a good thing too, since now for the Stage 2 beastie that is vaulting a barrier, I can paint the barrier up in similar style to my terrain!) I may even end up starting to paint the marauder faction first, since it would be a more normal method (no multi-stage multi-colour stains) which means I could paint a couple figs at a time instead of batch painting (also I can proxy the plague with all my genestealer cult stuff)
Tile effect 1 (fluorescent lights)
For the square pieces that look like one side of a rubiks cube, I decided that since they were clearly meant to be a ceiling piece, I would paint one side like fluorescent lights. I realize once assembled you probably won't see it very much, but it will be a nice bit of detail for photos from the right angles and was not very difficult.
Here is the final effect, some of the grey seeped through the masking tape, but not enough to be ruined and it will actually look pretty derelict in my opinion. Job done. It looks a bit glossier than it does in this photo, but not a crazy amount.
Tile effect 2 (indoor walls)
Similar with the above, I wanted the insides to have a different colour. It won't be easily noticable either, but will add an additional level of realism.
This gives some depth without a lot of effort - I made a simple spraying container with some bits of cardboard to hold the tiles at an angle to make spraying easier. These also ended up looking much dirtier after I finished the other sides as some spray paint clearly seeped through the painters tape I used on the back. Again I feel it just looks grimy & dirty and will suit very well. Job done.
Tile effect 3 (outdoor walls)
Now to make the outdoor walls special, I decided to do a few extra steps so these were generally more involved. I am extremely pleased with how they came out though and won't change anything for the second batch. I used a salt masking technique using cheap hairspray to stick salt to the tiles after the black/metal undercoat so I can easily show some battle damage/weathering.
In my opinion these tiles look absolutely fantastic. The chipped areas from the salt masking show a metallic base to the tile which looks like very realistic battle damage - whether from bullets or shrapnel.
Tile additional effect (outdoor walls)
Finally I wanted to do some extra detailing on a few wall sections. Less is more in this instance you want to pick very few tiles to do this to, since that makes it stand out more. So I picked about half the tiles, thinking it's easier to skip this step for the next batch if it seems like too much to "dilute" the amount of variant tiles.
This is the part I am the least happy with. I'm not sure if it was the can of spray paint or if I didn't wait long enough for the hairspray to dry but the yellow was very wet and masked some of the detail. That's why in the end I did the white zenithal highlight plus the gryphonne sepia wash to try and get that detail back. In the end it does still look pretty decent and I am satisfied.
Also after rubbing off the salt, I would recommend that for tiles where you plan to do a second round of salt + spray paint (ie. the yellow) that you avoid the fine salt on the first colour (ie. the space wolf grey) since it ends up with several coats of paint over it, it is quite hard to get it back off and it doesn't do enough through the two colours.
For the corner connectors I decided to not even bother painting them at all. You will barely see them so I didn't see much point. For the outer connectors I painted them the same way as the outer tiles. I was debating using the yellow until I was disappointed by it's coverage.
Here are a ton of links to people assembling and painting the deadzone terrain. There is lots out there to inspire you, especially with what configuration to assemble the buildings/bits. Next steps for me are to assemble this batch (at least one or two buildings - depending on the yellow bits I may need to paint the other tiles too so I can spread it out) and then applying some weathering powders and other details to the outside - at that point I will try to cover up little mistakes like the spray of yellow on the edge of the tile above.
White's Wolves ** absolutely fantastic tutorials here **
Anarchy of Anton!
Hammer Dialectic
Between the Bolter and Me
GMorts Chaotica
Tile effect 1 (fluorescent lights)
For the square pieces that look like one side of a rubiks cube, I decided that since they were clearly meant to be a ceiling piece, I would paint one side like fluorescent lights. I realize once assembled you probably won't see it very much, but it will be a nice bit of detail for photos from the right angles and was not very difficult.
- prime white
- paint a coat of water effects
- mask the "lights" in one direction and spray grey to cover the dividers
- do the same in the opposite direction
![]() |
| fluorescent lighting tile |
Tile effect 2 (indoor walls)
Similar with the above, I wanted the insides to have a different colour. It won't be easily noticable either, but will add an additional level of realism.
- spray black (zenithal aimed upwards)
- spray necrotic flesh (zenithal aimed downwards)
![]() |
| indoor tile |
Tile effect 3 (outdoor walls)
Now to make the outdoor walls special, I decided to do a few extra steps so these were generally more involved. I am extremely pleased with how they came out though and won't change anything for the second batch. I used a salt masking technique using cheap hairspray to stick salt to the tiles after the black/metal undercoat so I can easily show some battle damage/weathering.
- spray black (zenithal aimed upwards)
- spray plate metal (zenithal aimed downwards)
- soak the tiles with hairspray
- apply salt (I used both coarser sea salt and fine table salt) most folks suggest just the coarser but I felt a combination would look equally as realistic - I am quite happy with the effect
- spray space wolves grey
- very light spray of white (zenithal aimed downwards)
- very light spray of space wolves grey (zenithal aimed upwards) - doing the grey a second time makes sure the white is mostly on the top edges
- rub off the salt
![]() |
| outdoor tile |
Tile additional effect (outdoor walls)
Finally I wanted to do some extra detailing on a few wall sections. Less is more in this instance you want to pick very few tiles to do this to, since that makes it stand out more. So I picked about half the tiles, thinking it's easier to skip this step for the next batch if it seems like too much to "dilute" the amount of variant tiles.
- use painters tape to mark off the section of wall to be a different colour
- soak the tiles with hairspray
- apply salt (I used both coarser sea salt and fine table salt)
- spray demonic yellow (bright yellow works pretty well with the bluish/grey of the rest of the tiles)
- very light spray of white (zenithal aimed downwards)
- gryphonne sepia wash
- rub off the salt
![]() |
| outdoor tile with detailing |
Also after rubbing off the salt, I would recommend that for tiles where you plan to do a second round of salt + spray paint (ie. the yellow) that you avoid the fine salt on the first colour (ie. the space wolf grey) since it ends up with several coats of paint over it, it is quite hard to get it back off and it doesn't do enough through the two colours.
For the corner connectors I decided to not even bother painting them at all. You will barely see them so I didn't see much point. For the outer connectors I painted them the same way as the outer tiles. I was debating using the yellow until I was disappointed by it's coverage.
Here are a ton of links to people assembling and painting the deadzone terrain. There is lots out there to inspire you, especially with what configuration to assemble the buildings/bits. Next steps for me are to assemble this batch (at least one or two buildings - depending on the yellow bits I may need to paint the other tiles too so I can spread it out) and then applying some weathering powders and other details to the outside - at that point I will try to cover up little mistakes like the spray of yellow on the edge of the tile above.
White's Wolves ** absolutely fantastic tutorials here **
Anarchy of Anton!
Hammer Dialectic
Between the Bolter and Me
GMorts Chaotica
Wednesday, April 10, 2013
Terrain: Necromunda Walkways pt7 (last)
The final post! A week of necromunda terrain photos has come to an end. I'm sure you'll be seeing more of these once we get some games started back up again. So the final step after the weathering powders was a very light to light spray of black paint to give a soot effect. I held the can pretty far from the pieces so it wouldn't just paint all over everything but give a nice dotted effect. Between the weathering powder and this spray, it really helped to pull all the disparate parts of these terrain pieces together.
I also gave the undersides a much heavier spray. Yes you mostly can't see the bottoms of steps and such, but in necromunda you are often leaning over to get a model's eye view and I couldn't put up with the thought that the bottoms of the steps would look perfectly clean. This was a quick way to resolve that and it added a bit of extra depth to the soot being sprayed from a couple angles. Then all it needed was sealing, and a quick touch up of water effects over the blood and they were done.
![]() |
| front |
![]() |
| back |
Tuesday, April 9, 2013
Terrain: Necromunda Walkways pt6
Close to the light at the end of the tunnel now. The pieces were painted & washed, suitably cluttered and had some rubble & blood effects. The second last step (I'm not counting sealing, that was going to be required anyways for terrain this nice!) involved applying some weathering powders to give some rust effects. I ended up cheaping out a bit on this step as apparently it's better practice to use a few different shades of the powders to really get the best effect, but I only started reading about using them after picking up a single pot and I was impatient so one colour would have to be enough. Here's the final large walkway piece.
Applying the weathering powders was fun and easy. I highly recommend using some rubbing alcohol as your "binding" agent (binding in quotes as you could still brush it off, but it held it well enough that it didn't all spray away under a coat of varnish) - I tried a few different methods I found online and determined that combining two of them really did well for me. In future I will test with using one colour per method to see which works best. Method one is apply some powder dry and then use the end of a brush (not the brush end) to drop some rubbing alcohol above the powder and let it run down. Method two is once you have that wet streak - get some powder and kinda flick it off your brush onto the wet part. Always do this over some paper so you can kinda save the powder. You won't save it all and I just threw it into a "shit mix" of flock that I throw any kind of random flock bits into. I suspect it will work best with a darker colour using method one and a lighter colour for method two but I could be wrong.
![]() |
| left side |
![]() |
| right side |
![]() |
| back |
Monday, April 8, 2013
Terrain: Necromunda Walkways pt5
Now these pieces were starting to come together. All the junk piles and miscellaneous crap made them look busier and would also really influence the amount of cover provided from various angles. I used various types of flock and foliage in certain places (tried to keep the foliage to a minimum) which was especially helpful in hiding the pennies used to weigh down the pieces. This had the added benefit of avoiding the "clean" look. Even though there was a bunch of junk around, if there wasn't any dirt or rubble it might still seem a bit too put together. Here's another one of the small "gangways" which have steps that will allow gangers to get up the walkways from the ground floor.
I also decided to put a bit of blood splatter on each piece, some places it was obvious (like on this one, the serrated edge of that giant gear doesn't look very nice!) and on others I used it where the piece was starting to look a little plain. Basically painted some red down and gave it some washes with red and brown inks, and then used some water effects to give it a glistening effect.
![]() |
| right side |
![]() |
| left side |
I also decided to put a bit of blood splatter on each piece, some places it was obvious (like on this one, the serrated edge of that giant gear doesn't look very nice!) and on others I used it where the piece was starting to look a little plain. Basically painted some red down and gave it some washes with red and brown inks, and then used some water effects to give it a glistening effect.
Sunday, April 7, 2013
Terrain: Necromunda Walkways pt4
After getting these all assembled, sprayed metallic and washed with inks - they still looked really clean and not very "underhive". So I decided I needed to add some junk to give them character. Here's one of the smaller what I call "gangways" - not sure why I've given it that name but just to differentiate from the walkways (still not digging the "catwalk" term)
What I did was take a bunch of various bits I had collected for making terrain and while I was spraying the trophies for the Canadian Open this year - I left them in a box behind what I was spraying. So all the bits got some spray from gold, silver, bronze, and red. Then I gave them a quick spritz with some grey and necrotic flesh. Some got some green wash and some got some blue wash. I mixed up these bits and glued them on, along with some bits of cloth and bits of bamboo sticks.
![]() |
| left side |
![]() |
| right side |
Saturday, April 6, 2013
Terrain: Necromunda Walkways pt3
I used one of the shorter set of structure bits to make a long and low walkway for this piece. Once I had all the pieces assembled, my next step was to spray them all with the army painter metallic paint. After that I used a mixture of the soft tone and strong tone inks - also from army painter to wash over all the pieces. Some pieces got just soft tone, some got just strong and some got a mix.
This was the piece where I tried using a cut up longer railing and I ended up having to rip it off and use one of the actual laser cut smaller railings because it would have interfered with the connectors. The balance of this piece also (along with the last piece) convinced me I needed some sort of weight along the bottom to make sure any heavy models wouldn't tip it over, so there are some pennies glued in inconspicuous areas.
![]() |
| left side |
![]() |
| right side |
Friday, April 5, 2013
Terrain: Necromunda Walkways pt2
Here is another piece of the necromunda walkway scenery I have been working on this year. I bought a couple sets of Micro Art Studio "catwalk set" made of laser cut HDF - funny name - makes me think of this. I think it may have been more flexible if I left all the stairs separate and space to attach them, but at the same time it would also make setup take a lot longer and there would be the possibility of damage occurring while putting the table together. So for the most part I assembled each piece with one set of stairs attached.
Assembly was pretty quick and easy. White glue was all that was really required. You do need to be a bit careful, as I did break one piece just from pressing down too hard on it to try and pop it into place, but overall they went together really well. The one thing I will mention about assembling them is I tried cutting up the long railings to use as short railings that would look a bit different, but you need to pay attention to where you will be connecting them. They came with special connectors as well which are handy to string a bunch together temporarily.
![]() |
| right side |
![]() |
| left side |
![]() |
| back left |
Terrain: Necromunda Walkways pt1
I'm going to take some advice and split up these posts to stretch this accomplishment out. Late last year we began talking about playing some more necromunda again this year. The one thing I definitely was missing from my scenery collection is enough walkways to easily connect all the rest of my necromunda terrain and provide alternate routes for juves and gangers to traverse the gaming area. More walkways will also help to fill a full 8'x4' table so 2 games can go on at once!
Here is the first piece. As I go through the posts I will explain how I got them to this point.
These took significantly more work than I had anticipated to really give them some character. I am really happy with the final outcome though and it is a very large project complete which is always positive.
Here is the first piece. As I go through the posts I will explain how I got them to this point.
![]() |
| right side |
![]() |
| left side |
![]() |
| back |
Wednesday, February 23, 2011
Scenery pics/video: inspiration from dad!
Spent the weekend of Family Day (holiday Monday for us here in Ontario) up at my parents cottage with my folks and some friends. These pictures and video are from a visit last year but being there reminded me to post them up. My dad is the one who got me into modeling/painting - he always collected toy soldiers, model ships, etc. and when I was getting into D&D he found a Games Workshop and probably thought it was a good way to keep an eye on what I was up to and be able to teach me a bit as well (I always used to go with him to his hobby shows when I was younger) - the rest, as they say - is history.
My dad built this bell tower for his train set out of old business cards, using inspiration from GW's "How to make Wargames Scenery" book that he picked up years ago - he was always really impressed by the level of detail in GW models and terrain. The bell really works (though it's not wired up yet), as does lights in the lamppost and hanging above the door, even the water fountain "works" - it uses a specially shaped piece of clear plastic that gives the impression of water pouring down when it spins around. I thought the video had a better view of the "water" but it is a little difficult to see - still posted it so feel free to watch.
![]() |
| entire bell tower shot |
Just goes to show you that with a bit of effort you really don't need much to make a great looking piece of scenery. When I look at this piece - the few store bought bits (lamp, fountain) really tie it together and you would never guess it was anything but an entirely store bought piece of terrain. Every time I look at these pics, I want to build some scenery for my own gaming. It's a little tough right now with minimal work space but definitely something I'm looking forward to getting to one of these days, hopefully sooner rather than later.
![]() |
| close up of the water fountain |
Monday, September 21, 2009
Konflict Terrain or "I need to change my pants"
Recently I was like a kid waiting for christmas in anticipation of this package arriving. It was some custom made terrain my good friend Rick made for me (I found out he goes by Konflict Terrain, email him if you're interested, he also has a photo gallery) I'd asked for some futuristic necromunda/hive terrain. He came through in SPADES. I should let the pics do the talking but I can't help myself, he's done such an amazing job. It's absolutely perfect for necromunda - there are buildings of all sorts, bridges, piles of refuse, even spare foamcore bases. Perfect for the randomness of necromunda. I love all the little details like graffiti and posters.
Got our new digital camera so I got some nicer pics (IMO at least, still figuring it out). I wouldn't hesitate in the slightest to recommend Rick, as he's always been exceptional to deal with - and is just an all around nice guy.
ps. YES those are LEDs lighting up the pump (sump?) house. MUHAHAHAHAAAA!!!
everything in it's glory

random shots


the details


scenes

Got our new digital camera so I got some nicer pics (IMO at least, still figuring it out). I wouldn't hesitate in the slightest to recommend Rick, as he's always been exceptional to deal with - and is just an all around nice guy.
ps. YES those are LEDs lighting up the pump (sump?) house. MUHAHAHAHAAAA!!!
everything in it's glory
random shots


the details


scenes
Subscribe to:
Posts (Atom)